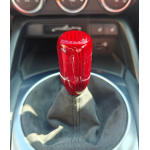
The wireless charger is fitted underneath the rubber part of the centre console shelf, in front of the gearstick.
Average time to install: 30 - 60 minutes
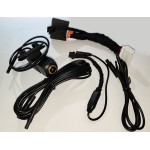
Items supplied in this kit are:
| Wireless charger coil |
USB cable |
 |
 |
| Car USB adaptor |
|
 |
All work in this installation takes place inside the car and involves items in the centre console. For best effect (to avoid any noticeable bumps under the rubber mat), it is advisable to modify one of the centre console panels using files, sanders etc. This is not completely necessary for the installation to work if you do not feel comfortable doing this.
Work in the Car
To fit the wireless charger, we first need to remove parts of the centre console trim. We will then optionally modify a hidden part of the trim; fit the wireless charging loop; install wiring; andf re-assemble the centre console.
a. Remove the gearlever knob by unscrewing in an anti-clockwise direction
b. Pull up on the silver part of the gearlever surround by gripping the inside edge of this part on each side, where the gearlever gator meets the surround. You have to pull relatively hard, but eventually the trim will release. If the front of the entertainment contol panel lifts up, merely push it down again whilst holding up the gearlever surround. When both clips are free, remove the surround panel by pulling gently up and backwards.
c. Turn this trim piece over and remove the rubber mat by uncliping the five rubber tangs securing it to the front of the gearlever surround. There is a piece of double sided tape holding the curved rear edge to the gearlever surround - gently pull the rubber away from this tape until it is completely removed.
d. If you are going to modify the centre console panels to allow for the best fit, it is necessary to remove the front plastic panel from the gearlever surround. This is held on by two plastic (white) clips - gently pry first one side then the other apart until you have the front piece seperated from the gearlever surround.

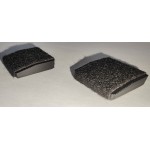
e. Using a Dremel or similar device, remove some of the plastic on this front panel piece so that it somewhat resembles the picture below. You do not need to remove quite as much material as shown in this test piece; you are merely trying to create the 3 or 4 mm clearance needed between the plastic base (the piece you are modifying) and the rubber mat which sits on top of it
f. If you are not happy modifying this panel (as shown below); you can sfely ignore these steps and proceed to the next step.
g.  Re-connect the two panals which we previously disassembled, so that they look something like the picture to the right. This is the last step of bodywork modification.
h. We now need to install the wireless charging coil on top of the front plastic panel, ensuring that the coil is clear of the forward central rectangular hole in this panel (which is where one of the rubber mat's clips fits). Place the coil in place and ensure it clears this hole, as indicated below. 

i. Once the coil is in place, secure it with a piece of double sided tape below it; then refit the rubber mat over the top of the plastic. Ensure the wires from the coil pass either side of the rubber mat's middle fixing, and then do up the rest of the rubber clips. Finally attach the circuuit board to the underside of the whole assembly.
j. The coil is now fitted to the centre console panel, so all that remains is to run a USB power cable from the centre console to the closest power source. This can be accomplished in a variety of ways, but I chose to route the cable under the centre console front trim so that it exits in the passenger side footwell next to the car's built in auxilery power socket (cigarette lighter socket). I then plugged a car socket to USB converter into this socket to provide the needed USB power connection.
k. Finally, re-install the centre console shelf into the car, ensuring you plug in the USB cable at both ends, then turn the ignition on and check that your phone starts charging as expected.
If you have any problems with this installation, please see our FAQ articles relating to it.